Turn Old T-Shirts Into Reusable Cleaning Cloths: A Practical Upcycle
Key takeaways
Cut around stains and weakened seams, choose absorbent sections, and finish edges only when the fabric sheds or curls enough to bother you. This guide treats old T-shirt cleaning cloths as a small, practical learning project rather than a test of speed or perfection. Work slowly, test on a scrap, and choose a finish that matches the actual use of the item. A modest first version teaches fabric behavior, measuring, stitching, and repair judgment without requiring a large supply purchase.
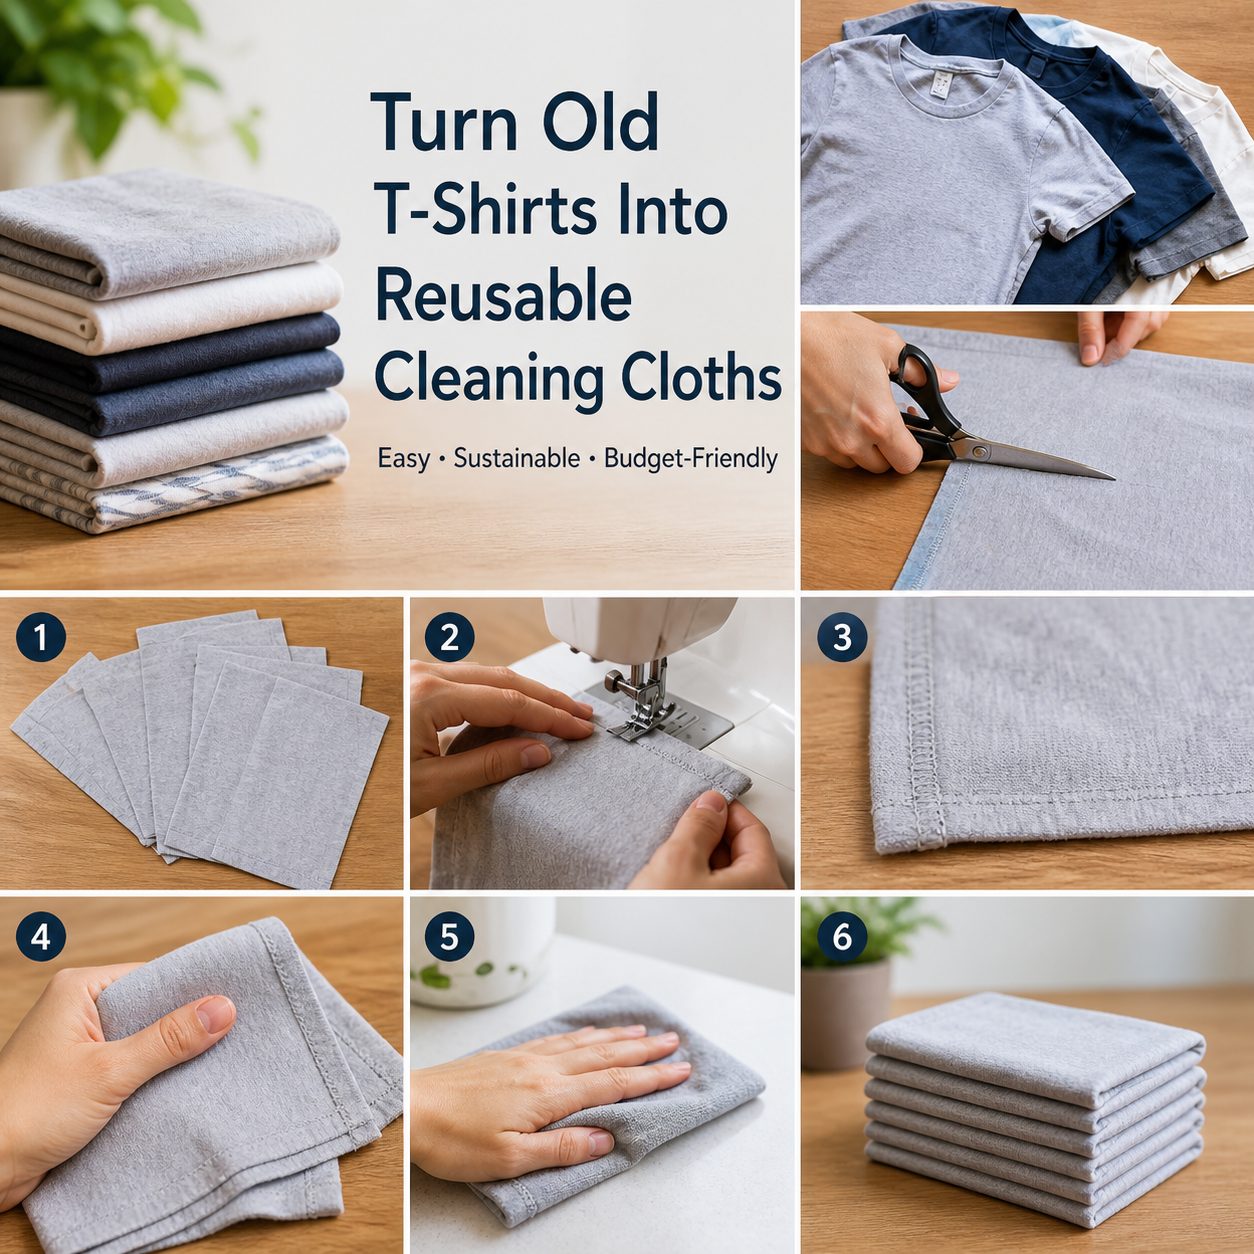
Start with a realistic plan
Imagine a worn T-shirt becoming a useful set of washable household cloths. Begin by looking closely at the material, seams, and existing wear. Not every garment is a good candidate for repair or refashioning. If the fabric is very thin, badly stained, brittle, or uncomfortable, another reuse or local disposal option may make more sense. For a workable item, decide exactly what the finished piece needs to do. This one-sentence goal keeps the project from drifting into extra details before the base is secure.
Materials and setup
Gather the item, a ruler or tape measure, a washable marking tool, pins or clips, a needle and thread for hand work, and a machine only when the method needs one. Add sharp fabric scissors, a seam ripper, and an iron with a suitable pressing surface when the fabric care guidance allows it. Denim has its own behavior, so test stitch tension, thread color, and pressing temperature on an offcut or hidden area. A short test is cheaper than correcting a visible mistake.
Step 1: Measure and mark
Lay the material flat without stretching it. Mark the change lightly and leave room for seam allowance, a hem turn-up, or a patch edge. Check both sides before cutting. If the item is wearable, try it on or compare it with an object that will use it. For a home project, measure the actual pillow, basket, table, or container rather than relying on a guess. The most common beginner problem is cutting to the final size without allowing for the construction step.
Step 2: Make a sample
Use a small scrap to practice the one action that matters most. It may be a straight seam, a hand hem, a reinforced corner, a zipper line, or a patch edge. Stitch at a relaxed pace, then turn, pull, and inspect the sample. If it puckers, first check whether the thread is too tight or whether the material was stretched while sewing. If it twists, check whether the edges were aligned and pressed. Change one variable at a time so the next sample teaches you something useful.
Step 3: Build the useful structure
Move from the stable center of the project toward the edges. Keep the fabric flat, guide it instead of pulling it, and pause after each seam to press or finger-press it open. Pressing helps seams sit where you intended and makes bulky areas easier to see before they become permanent. Use a seam ripper calmly when needed. Removing a short line of stitches is part of ordinary sewing practice and is usually faster than trying to hide a problem under extra layers.
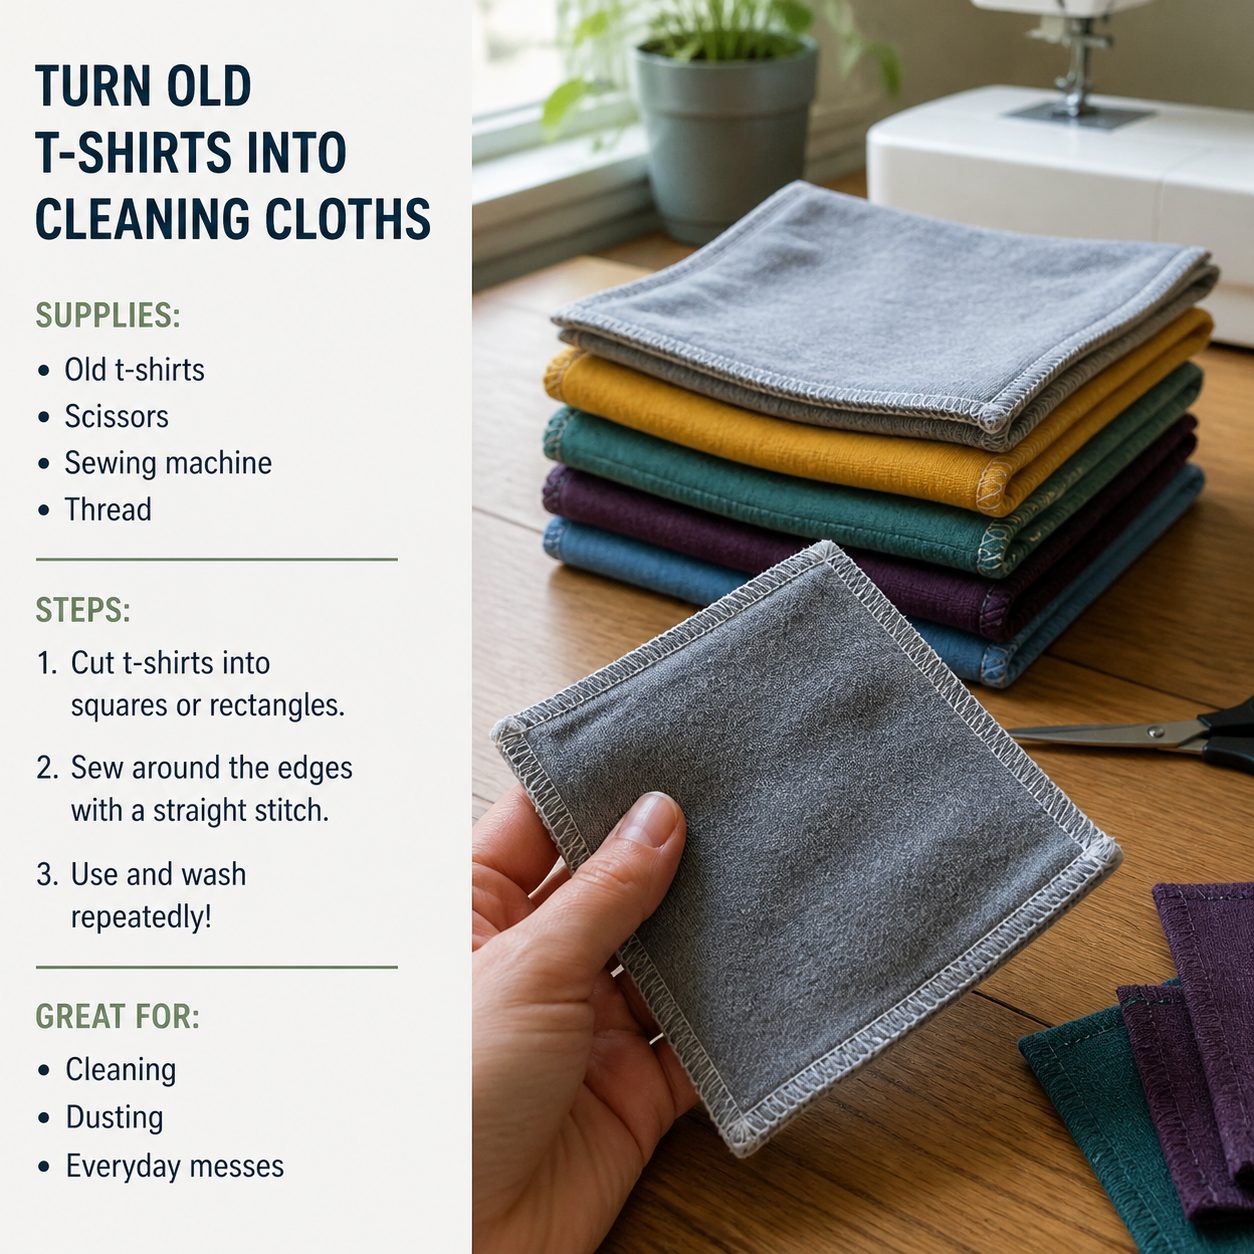
Step 4: Test the way it will be used
Before adding decoration, check the function. Bend repaired clothing, open and close a pouch, place a cover on its insert, or put a light item in the bag. Look for rough thread ends, strain at corners, uneven edges, and areas where the fabric pulls. Reinforce only when the test shows a real need. Do not make performance claims about a project that has only been tested lightly. A beginner-made item can be useful, but it deserves realistic use and regular inspection.
Step 5: Finish and document
Trim loose threads, remove temporary marks according to their instructions, and press the item if appropriate. Write down the material, needle or stitch choice, and one change for a future version. The U.S. Environmental Protection Agency provides textile material data and reuse context, but it does not mean a single DIY project has a measured environmental result. The value here is learning to assess and use material thoughtfully.
Common mistakes
Avoid cutting before measuring, using a sharp tool while distracted, forcing a woven-fabric method onto a stretchy knit, and skipping the sample. For children, use age-appropriate materials and adult supervision around needles, scissors, irons, and small parts. Follow manufacturer instructions for machines and tools. When sharing product links in the future, disclose any paid relationship or commission clearly near the recommendation.
FAQ
Is old T-shirt cleaning cloths beginner-friendly?
Yes, when the project is kept small, the material is stable enough to handle, and you allow time for a sample and a correction.
Do I need a sewing machine?
Not always. Many repairs and simple transformations start well with hand stitching. A machine can help with repeated straight seams but does not replace careful measuring and pressing.
What should I do if the fabric is not working?
Pause, save the usable pieces, and choose a smaller or different project. It is better to change the plan than force a material into a finish it cannot support.
Related next step
Once you have finished old T-shirt cleaning cloths, repeat one technique on a small scrap or second item. That deliberate repetition turns one project into a practical skill and makes the next refashion feel less mysterious.